Building a computer is a very doable project these days. There are tons of books, articles and YouTube videos out there with tones of ideas. This is my summation of what it takes to build a basic tower computer. Laptops and super gaming computers are not the goal here although even a top-notch screaming gaming machine share most of the components.
A real basic computer has at least the following parts:
A case
This is the metal box that holds everything. It includes places to hold everything below. You can get very fancy here, but a basic mid tower case will run you about $40, or even less on sale.
A power supply
The power supply normally attaches to the case with four screws. It converts power coming from the AC socket into voltages that run your storage devices and power the motherboard.
A processor
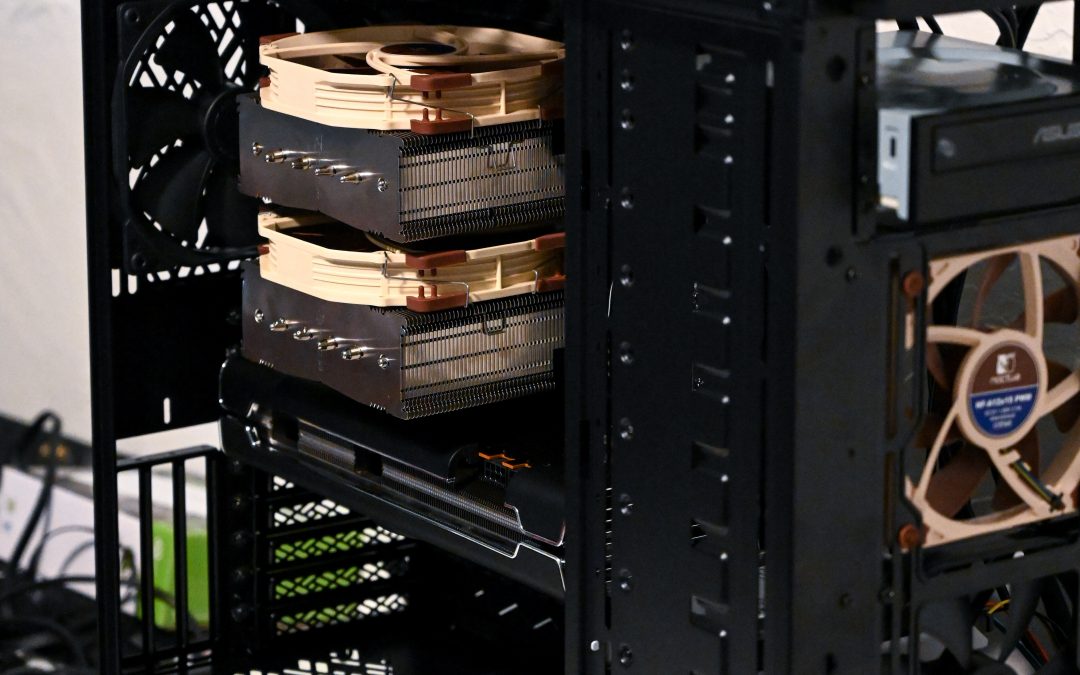
This might be considered the brains of your computer. It is where all the processing magic takes place. It is usually a small square “chip” with lots of pins that fit into a socket on the motherboard. A cooling fan usually comes with the processor and it is important to keep the processor from overheating.
A motherboard
If the processor is the brains, then the motherboard is the guts of your computer. It mounts in then case and everything plugs into it.
Memory
Memory stores information temporarily for your applications. It consists of rectangular chips that fit into slots on your motherboard. There are usually two or four memory slots on the board.
Storage device
This is your long-term storage for your applications and data. It can be a traditional mechanical hard drive or a couple different kinds of solid-state drives without any moving parts.
Optional DVD Drive
A DVD drive used to be included on every computer to load your applications which were delivered on DVDs or CDROMS. Now many applications can be delivered online or via a USB flash drive.
Building a basic tower computer
Here are the steps I use in building a computer. If you are a beginner you may want to review books, online articles, and YouTube for the various steps. It also helps to have an experienced builder help you the first time. Like learning anything the first one is the hardest and it gets much easier the second time around!
Mount components on motherboard
First mount the processor and memory on the motherboard. Lay the motherboard on a flat soft surface. The processor only attaches one way – don’t force it. You usually lift a little lever, drop the CPU into place and secure the lever. Then mount the cooling fan. It will come with directions. The fan’s power comes from connecting it to a spot on the motherboard. Finally, mount the memory in the slots on the motherboard. The slots usually have little levers that you first push open, then insert the memory stick (only goes one way,) and then a gentle push on the memory stick will lock the memory in place.
Mount power supply in case
The power supply usually attaches simply with four screws. It easiest the lay the case down flat at this point. Move all the wires coming from the power supply out of the way temporarily.
Mount Motherboard
Mounting the motherboard to the case required a few steps. Motherboards are somewhat delicate, so you don’t want to force anything to allow anything to short out.
Start by pressing the little faceplate (IO Shield) that comes with the board into the case. It allows all the various ports to pass through when the motherboard is mounted correctly.
Next look at the mounting holes on the motherboard and line these up with the available holes on the case. For the holes that are used you will screw in little “standoffs,” usually brass colored, that screw into the case and in turn allow the motherboard to be attached using small screws.
Finally, you will attach assorted wires to the motherboard. These will vary and you will need to consult your motherboard manual. In general, you will have:
One of more power connectors from the power supply – usually one long one and one 6 or 8 pin connector.
An audio connector from the board to the case.
One or more USB connectors from the board to the case.
Small front panel connectors for the power switch, power LED, and others
Storage devices
These mount in the case, or on the motherboard or an M.2 SSD. Those that mount on the case have connectors. One is from the power supply. The other connects to the motherboard. Again, check your manual for the location.
The moment of truth
Check your connections, attach a keyboard and mouse, and turn on the computer. If all is good a BIOS message will appear, and you can breathe easier! If not don’t panic. Check all your connections, it is usually something simple that you overlooked.