oday’s computers have a limited number of modules. The CPU can be considered the “brains”. The motherboard can be considered the “guts.” Using the same kind of logic the power supply can be considered the “juice.” Without juice nothing happens and a computer becomes nothing more than an expensive doorstop.
How They Work
A computer power supply takes the AC power from the wall socket and converts it to low voltage DC current that can be used by your computer. Normally different connections from the supply supply 3.3 volts, 12 volts, and 5 volts. The different voltages are used by the various components of the system, with the lower voltages used by the motherboard and CPU, and the higher voltages used by the attached peripherals. There are connectors attached to the wires, with the fancier models having connectors for more, and different types of peripherals.
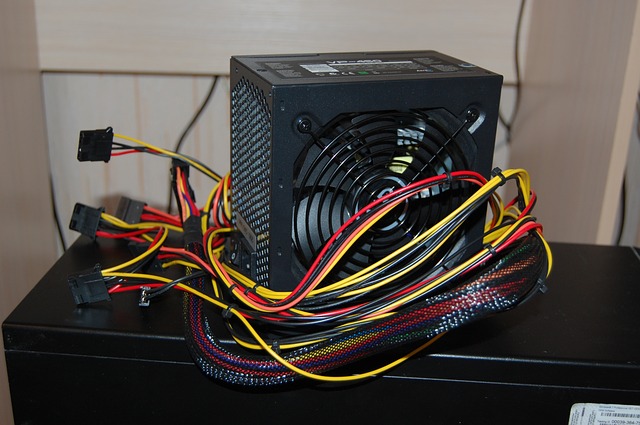
Power supplies use transformers, capacitors, and other components internally to supply the different voltages. Those and various heat sinks are housed within a metal box that is attached to the computer case. Many have a built-in fan to help dissipate the heat. Laptops usually use an external power supply that has similar components housed in a plastic box.
You Can Get Hurt!
As with any electronic device a power supply can shock you. It is even possible to get a shock from an unplugged supply because some charge is stored in the capacitors. Use common sense. Don’t open the case of the power supply, there is nothing serviceable for the average person. And obviously unplug the computer before messing with the power supply. I have installed hundreds of power supplies over the years with no problems at all.
Most Common Computer Issue
I have found a bad power supply is the most common computer hardware problem. Symptoms range from nothing working at all to unexpected shutdowns of the system. With these kinds of symptoms the first thing I usually try is replacing the power supply, so I always have a spare on hand for testing..
Quality Questions
When replacing a power supply you really have to watch the quality. My experience with very cheap power supplies is that a certain percentage will be dead on arrival, and others may die after a few months of use. If you check the reviews there is usually a “sweet spot” where the price is reasonable but the quality is still good.
How Many Watts Do You Need
The power of a particular power supply is usually measured in watts. Thay can range from as low as 200 watts up to 1000 or more. Gamers have driven the availability of high wattage power supplies in order to handle the power needs of one or more high end graphics cards. Here is my recommendation based on experience:
400 watts – lower end PCs with integrated graphics (no separate video card)
500 – 600 watts – mid level PCs with a lower end separate graphics card
600+ watts – high end gaming or graphics artists PCs with one or more high end graphics cards
How to Replace a Power Supply in a Desktop
This procedure is taken from my book “Your Computer Business.” It is available here:
Tools Needed
Screwdriver (preferably with a magnetic tip)
A sturdy worktable with good lighting
Materials Needed
The Power Supply
Four screws to attach the power supply to the case
Procedure
1. Set the computer on the table with the back facing toward you. (Of course, the computer must be off, with the power cord removed.
2. Remove the right side of the case (when viewed from the back of the computer. Normally this means removing either 2 or 3 screws on the back of the case and carefully removing the side.
3. Lay the case down on the table flat, with the front to the right, and the back to the left.
4. The power supply is the rectangular box, usually in the upper or lower left-hand corner with lots of wires coming out of it. However, before you can remove it you must disconnect all the wires to the various devices. These include:
ATX Power Socket on Motherboard – there is a small plastic tab on the side of the socket that must be released
All hard drive power cables
DVD Drive
Video Card
Sometimes a 6 or 8 prong auxiliary power connector on the motherboard.
Anything else that is connected to the power supply.
5. After all the various power cables have been unplugged you can remove the old power supply. It is held in place with four screws on the outside back of the computer case. Be careful not to damage any sensitive components while removing the power supply.
6. Install the new power supply using the same four screws you took from the old power supply. Again, be careful inserting the new power supply into the case so you don’t damage anything.
7. Reconnect the power cables to all the same devices that you previously disconnected. These include:
ATX Power Socket on Motherboard – there is a small plastic tab on the side of the socket that must be released
All hard drive power cables
DVD Drive
Video Card
Sometimes a 6 or 8 prong auxiliary power connector on the motherboard.
Anything else that is connected to the power supply.
8. Replace the case side and test your installation by booting the computer.
Troubleshooting
The most common problem is that you forgot to plug in one of the power cables that you disconnected when removing the old power supply. Also, make sure the switch on the outside of the power supply is set to “On”! If there is a 0 or 1 on the switch, “1” is “On!”